Want to roll your iPhone or iPad back to iOS 13? Here's how.
If you overly-excitedly updated your iPhone to the beta of iOS 14 and are now faced with regret, you can always downgrade back to iOS 13. All you need is an archived backup of your device from prior to installing the beta of iOS 14 on your Mac or Windows PC, and to follow the steps below!
Note: If you're reading this article on the iPhone you want to revert, either print it out first or open it on another iPhone, iPad, or computer so that you can read along as you go.
- How to put your iPhone and iPad into recovery mode
- How to downgrade to iOS 13 on your iPhone or iPad
- How to restore your archived iOS 13 backup to your iPhone or iPad
Remember to make sure you have an archived copy of the previous version of iOS or these steps won't matter.
How to put your iPhone and iPad into recovery mode
There's no button tap to revert your device back to the standard version of iOS. So, to get started, you'll need to put your iPhone, iPad, or iPod touch into Recovery Mode.
-
Turn off your iPhone, iPad, or iPod touch following the steps below for your device:
- On iPhone and iPad devices with Face ID, Press and hold the Side button and either volume button until Slide to Power Off appears, and then drag your finger across the slider.
- On iPhone 8 and iPhone 8 Plus, hold down the Side button until Slide to Power Off appears, and then drag your finger across the slider.
- On iPhone 7, and older, all iPads with a Home button, and all iPod touch models, press and hold either the Side or Top button until Slide to Power Off appears, and then drag your finger across the slider.
- Plug the cable that came with your device into your computer.
- Plug the cable that came with your device into your iPhone, iPad, or iPod touch.
-
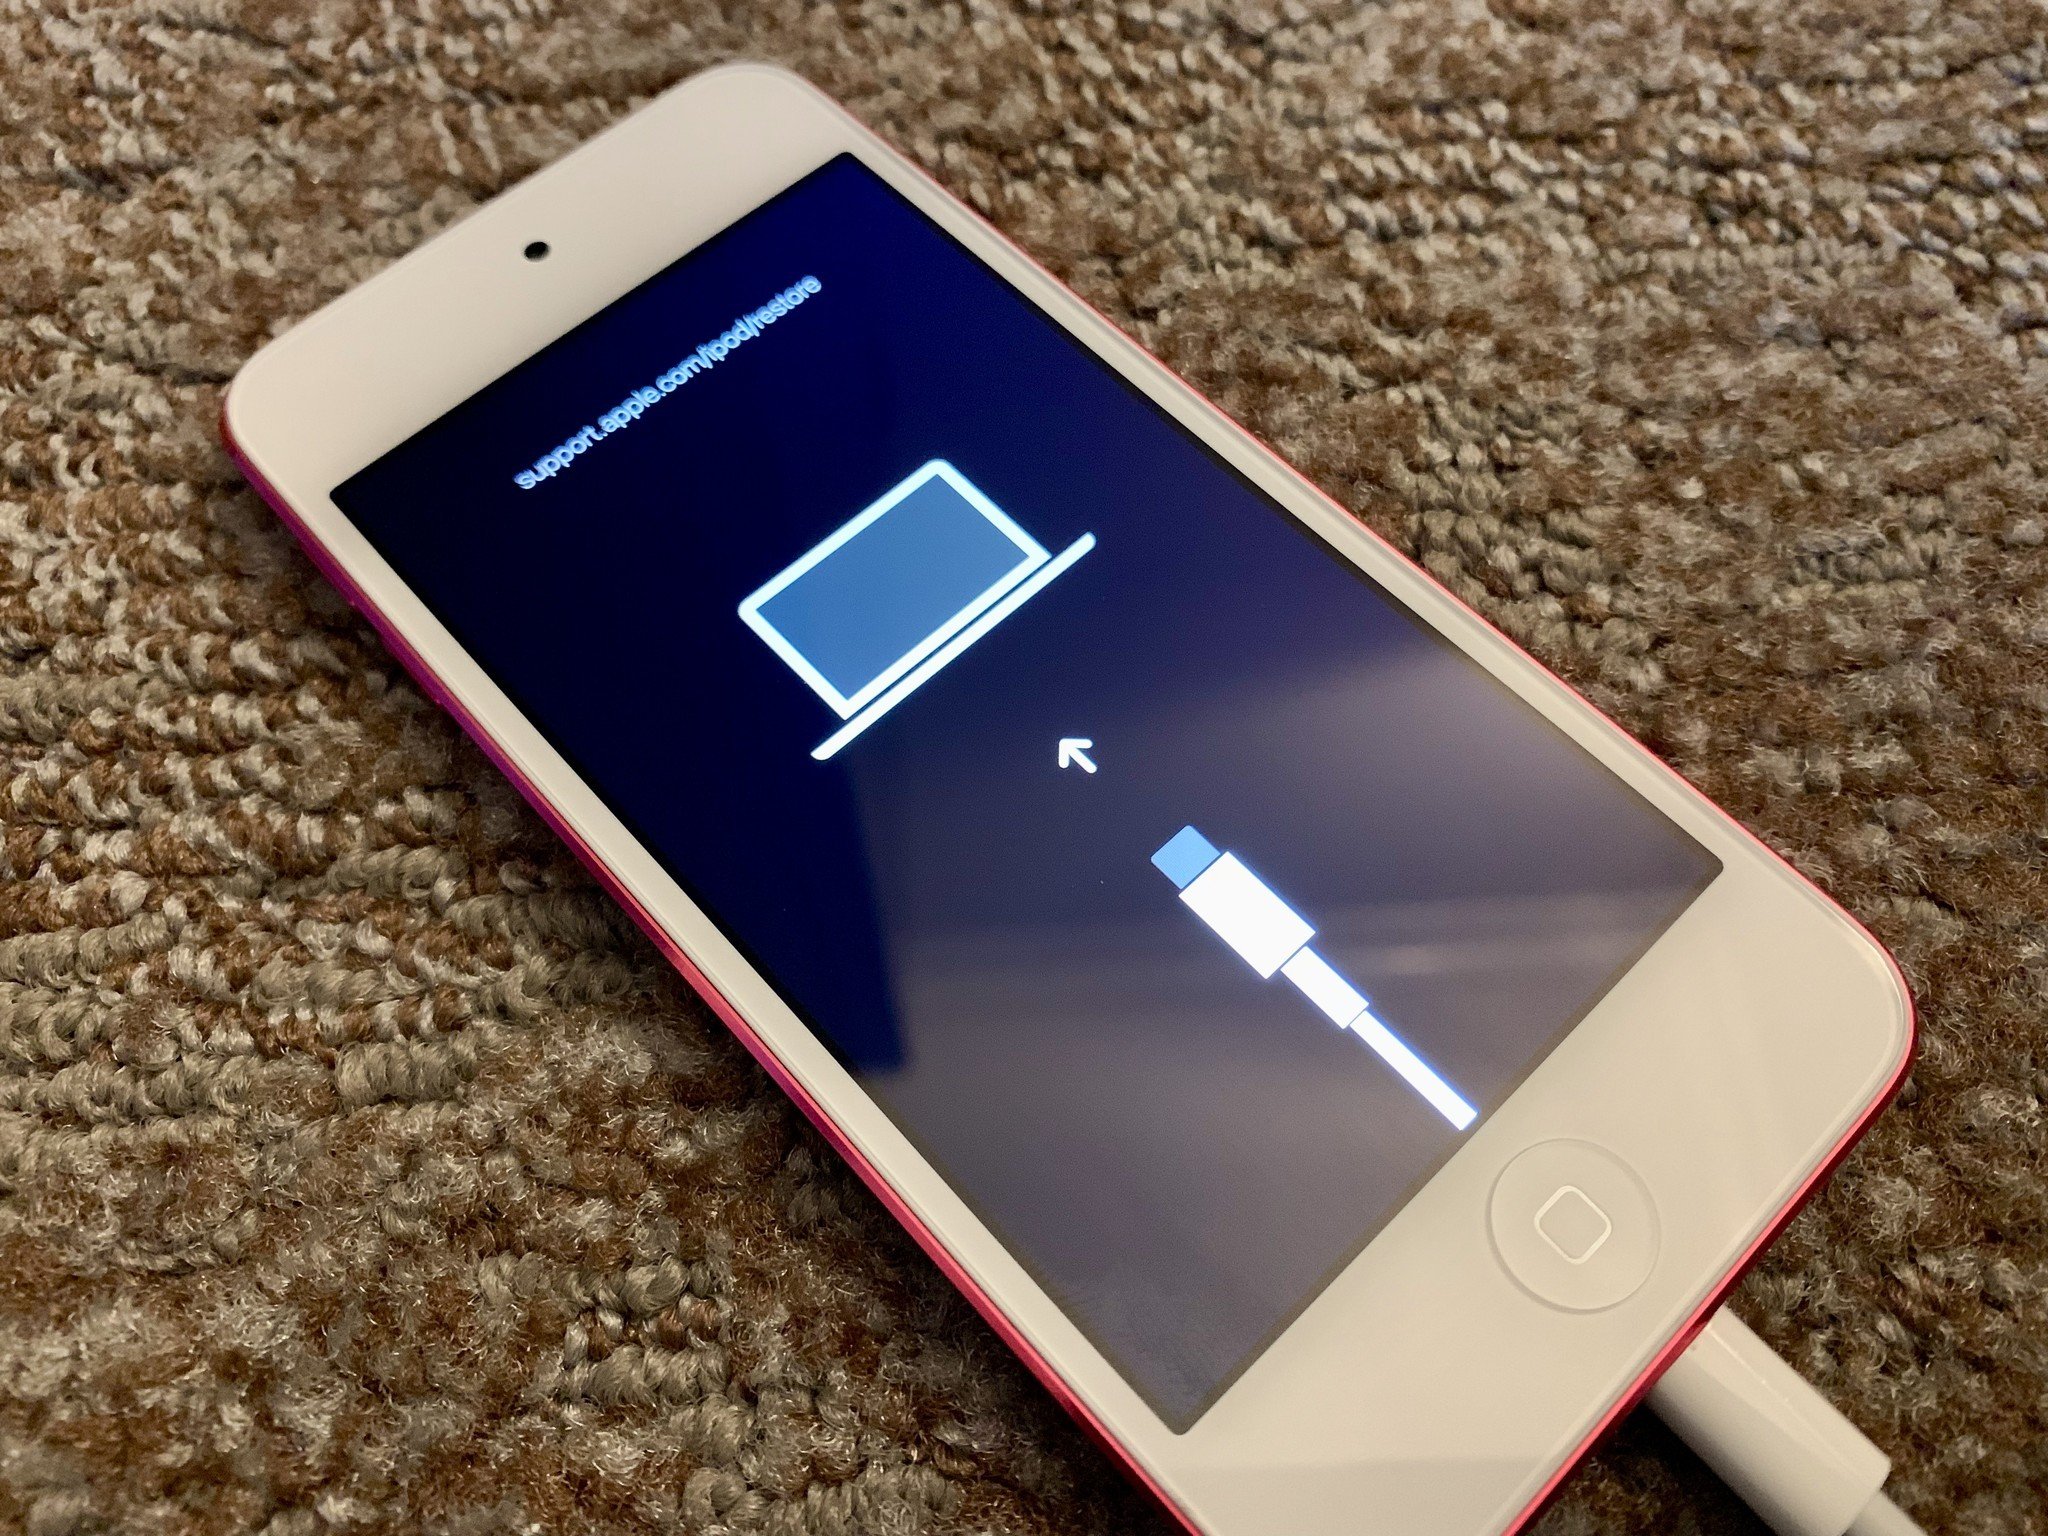
Press the series of buttons related to your device, in order, to trigger Recovery Mode:
- On iPhone iPad devices with Face ID, press and hold the Side button until you see the Recovery Mode icon.
- On iPhone 8 and iPhone 8 Plus, press and hold the Side button until you see the Recovery Mode icon.
- On iPhone 7, iPhone 7 Plus, and iPod touch (7th Gen), press and hold the Volume Down button until you see the Recovery Mode icon.
- On an iPhone 6s and older, all iPads with a Home button, and iPod touch (6th Gen) and older: Press and hold the Home button until you see the Recovery Mode icon.
If for some reason, Recovery Mode doesn't work, you can also try putting your iPhone or iPad into DFU mode. Device Firmware Update mode is a little trickier to get into, but will often force a restore even when nothing else works.
How to downgrade to an older version of iOS on your iPhone or iPad
If iTunes on your Mac or Windows PC doesn't launch automatically, launch it manually. iTunes will detect your device in recovery mode and ask you what you want to do.
Note: in macOS Catalina, your device will appear in Finder instead. Launch the Finder window and select your device from the sidebar. The rest of the instructions are the same.
- Click Restore on the iTunes popup.
- Click Restore and Update to confirm.

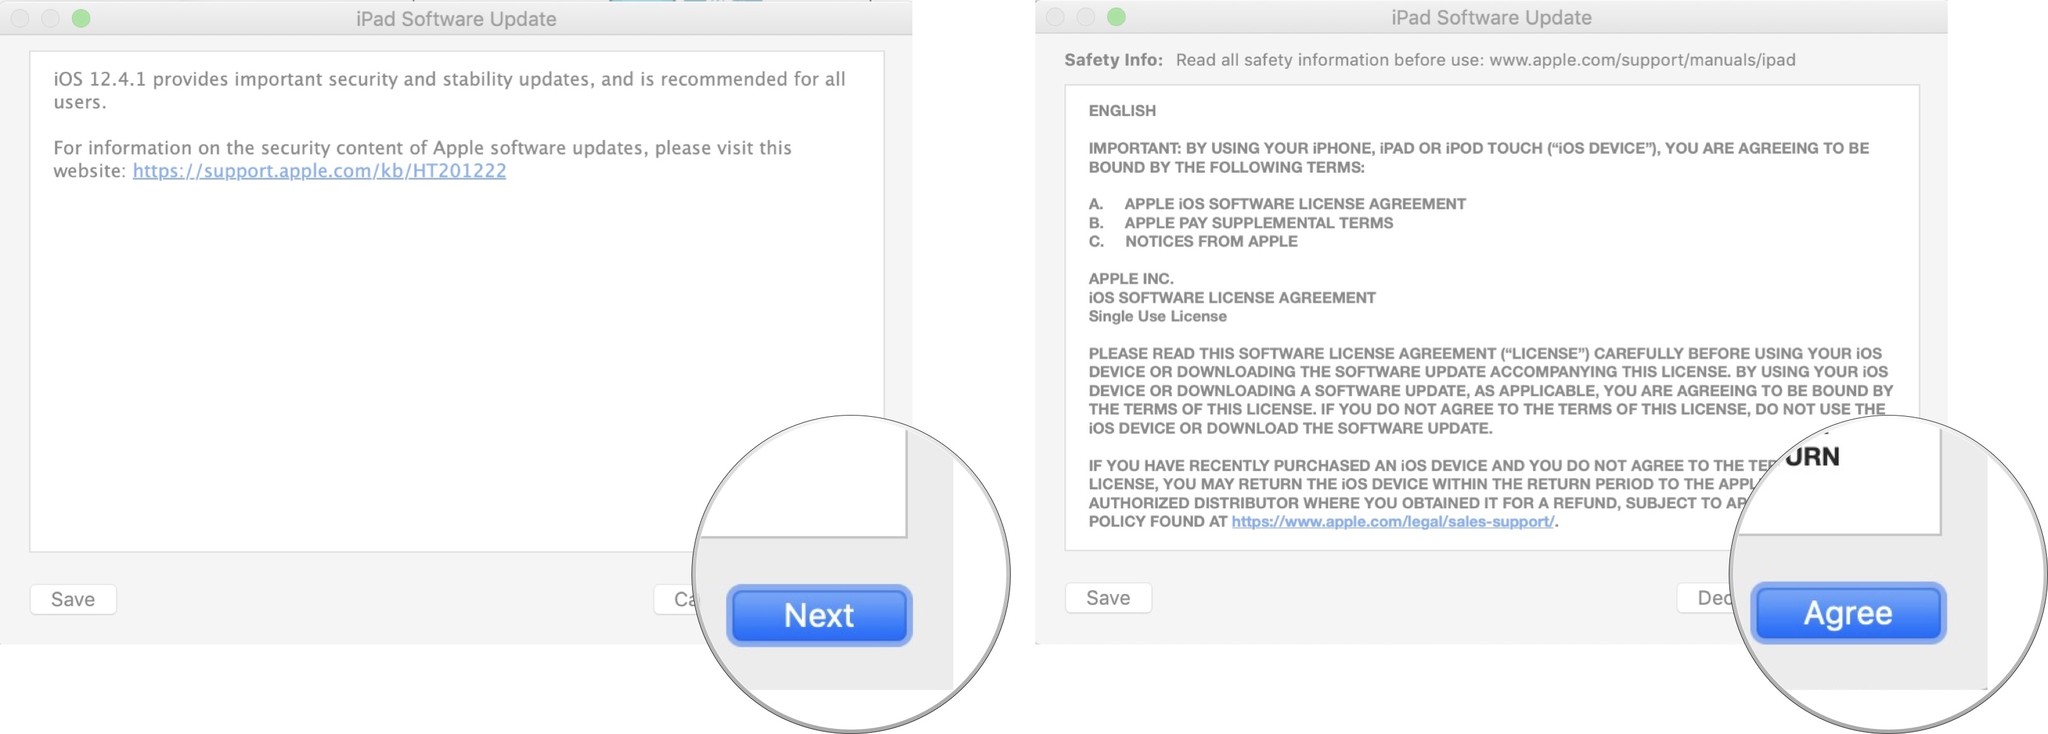
- Click Next on the iOS 13 Software Updater.
-
Click Agree to accept the Terms and Conditions and start downloading iOS 13.
If your device reboots to iOS 14 before the download is complete, simply repeat the steps above and put it back into Recovery Mode. Once the download is complete, your iPhone, iPad, or iPod touch will be restored to the older version of iOS.
How to restore your archived iOS backup to your iPhone or iPad
Once your device is restored, it'll have a clean copy of the latest standard version of iOS. To get your data back, you'll need to restore from a previous backup. If you've been running the newest software for more than a day, your standard iCloud or iTunes backup will likely be based on that software release and may not restore properly to a device running the older version of iOS. That's where the archived backup you made prior to installing the new software comes in. (You did make a backup, right?)
- Select Restore from this backup in iTunes (or Finder in macOS Catalina).
- Choose the archived backup you made before installing the beta software update.
Once the restore is completed, your iPhone or iPad should be back to where it was before you installed the new software. If you've made any major changes since then, and they don't sync back some other way, you may have to repeat them to get back to exactly where you were before downgrading.
If you run into any trouble or have any questions, ask away in the comments!
Updated July 2020: Updated for the beta of iOS 14.
from iMore - The #1 iPhone, iPad, and iPod touch blog https://ift.tt/2sIvgrT
via IFTTT


No comments:
Post a Comment